
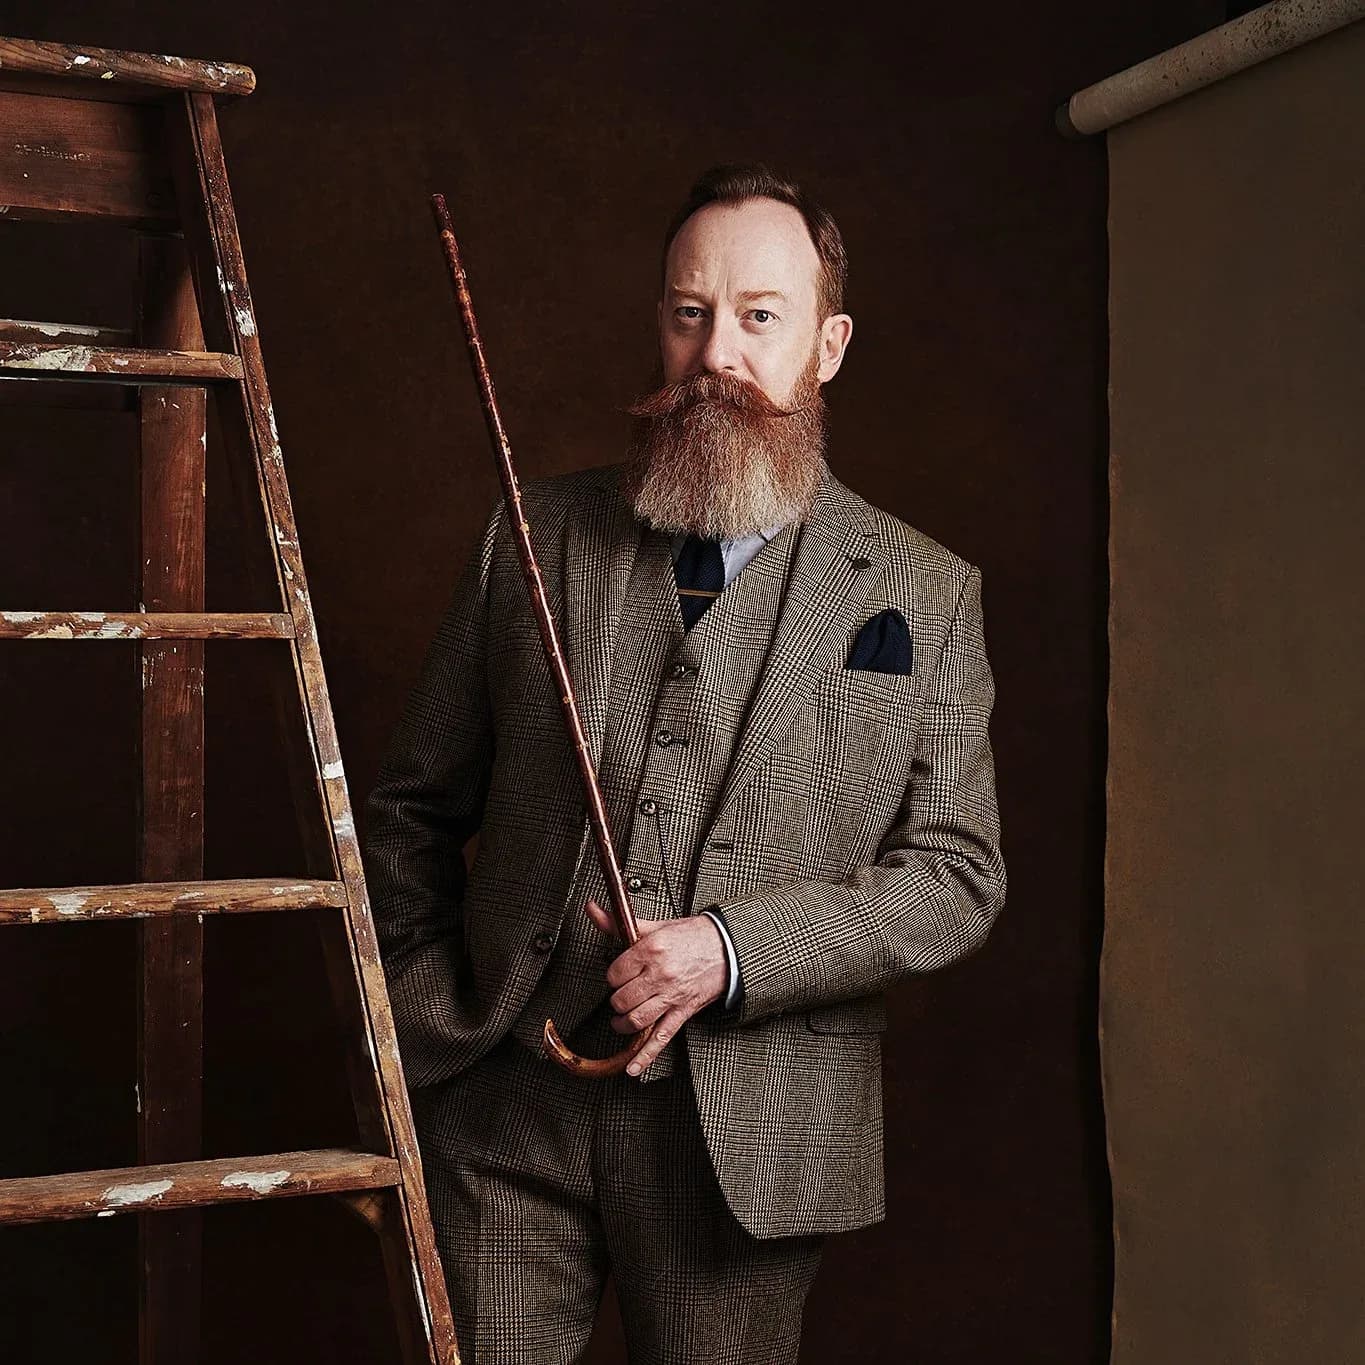
The magic of a great portrait lives in the light. We photograph faces, moments and emotions — but how we illuminate a face can transform the whole image. Without the right light even the most striking features get lost; with it, an ordinary face becomes a portrait that commands attention.
When you paint with light, every shadow and highlight has a role to play, as much as the subject's expression or their clothes. That is what studio lighting really is: not just brightening a face, but shaping light deliberately to build a mood and lead the eye to what matters. Master it and your portraits move from ordinary to extraordinary.
Understanding light
The idea is simple but it runs deep. Three basic properties of light do most of the work in a portrait: its intensity, its colour and its direction.
Intensity — brightness — sets the mood. A hard, high-intensity light casts strong shadows for a dramatic effect; a softer, lower-intensity light calms the picture down. Colour matters too: every source has a colour temperature that changes how skin renders, from the warmth of a low sun to the cool cast of open sky. Direction gives a face texture and dimension — light from a particular angle lifts the features you want to show and hides the ones you don't.
Balancing those three is the challenge: enough to reveal a subject's best features without washing them out. It takes practice, but once you can read light it stops feeling like guesswork.
The core lights
Most studio setups are built from four lights, each doing a different job.
- Key light — your main source and the one that decides the overall look. Raised and to one side it carves out dramatic shadow; near face level it turns soft and flattering.
- Fill light — the key light's sidekick. Usually gentler, it lifts the harsh shadows the key light leaves behind, and its intensity sets how much contrast the portrait carries.
- Back light (rim light) — placed behind and slightly above the subject, it draws a thin line of light around their edge, separating them from the background for an almost three-dimensional feel.
- Hair light — set above and behind, it adds shine and texture to the hair. Go easy: too much and your subject looks like they are wearing a halo.
Learn these four and you can combine them endlessly. A small shift in where they sit changes the whole story a portrait tells — and that is where the craft lives.
Choosing your gear
Good light is less about flooding a subject with lumens than having the flexibility to shape it. A few tools widen what you can do.
- Softboxes and umbrellas soften and diffuse your main source. Softboxes give a more directional, controllable output; umbrellas spread a broad, even light but are harder to contain.
- Reflectors bounce light back to fill unwanted shadow. White and silver add punch, gold warms the skin.
- Flash and strobes give you power and control — a quick burst where the ambient light falls short, or steady, heavy-duty output for a full studio setup.
And do not forget the background — it is part of the light, not an afterthought. A hand-painted canvas behind your subject changes the mood as much as any modifier.
Setting up the studio
Good lighting starts with a well-arranged room. Begin by placing your key light slightly off to one side for a natural balance of drama and visibility, set the fill opposite to soften the shadows, and use the back and hair lights behind the subject to add depth.
Distance matters as much as position: bring a light closer and it grows softer and stronger; move it back and it hardens and weakens. Keep your reflectors, meters and cables within reach so nothing interrupts the flow — then experiment. Your best tool is a willingness to move things and see what happens.
Techniques worth learning
A few classic patterns have shaped portraiture and are the perfect place to start.
- Rembrandt lighting — named after the painter, it leaves a small triangle of light on the cheek furthest from the source. Deep, cinematic and timeless.
- Butterfly (paramount) lighting — the light sits high and directly in front, casting a small shadow under the nose. Flattering for cheekbones and eyes, a favourite for glamour and beauty.
- Split lighting — one side of the face in light, the other in shadow. Bold and intense, ideal for mystery and depth.
Treat these as starting points rather than rules. Combine and tweak them and, over time, a lighting signature of your own will emerge.
In post
Editing is the finishing touch, not the fix. Lightroom and Photoshop let you refine exposure and contrast to emphasise the light you already shaped — used sparingly. There is a line between enhancing a portrait and over-editing it; keep skin texture and colour honest so the image still feels real.
In short
The art of portraiture is tied to the mastery of light. Think of yourself as a sculptor working not in marble but in shadow and highlight — some strokes bold, some soft. It does not come overnight. Experiment, make mistakes, and make more. Each frame brings you closer to the quiet language of light, and to portraits that could only be yours.